Enable Hyper-V on Windows 10/11 Pro and Home Editions
In addition to the Windows Server platform, the Hyper-V virtualization platform is also available in the desktop Windows editions. Users can create and run virtual machines using the built-in Hyper-V hypervisor. This article explains how to enable the Hyper-V feature on Windows 10 and 11.
The Hyper-V virtualization feature can be installed on the Pro and Enterprise editions of Windows 10 and 11. First, check that your computer hardware supports Hyper-V virtualization. Open a command prompt as an administrator and run:
systeminfo
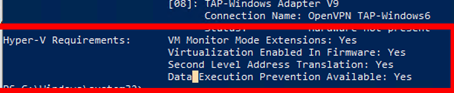
Scroll down to the bottom of the output and check that the following components are enabled under Hyper-V Requirements:
VM Monitor Mode Extensions: Yes
Virtualization Enabled In Firmware: Yes
Second Level Address Translation: Yes
Data Execution Prevention Available: Yes
If it says Virtualization Enabled in Firmware: No, enable hardware virtualization support in your computer’s BIOS/UEFI settings (it may be called Intel VT-X or AMD-V).
Then go to the CPU tab in the Task Manager and check the processor compatibility: Virtualization: Enabled should be specified here.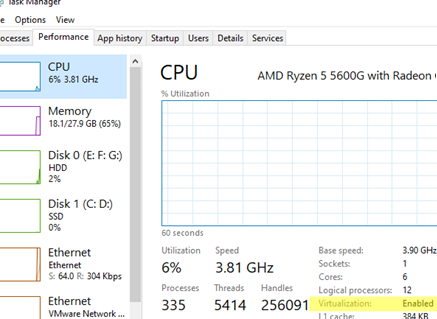
If the Hyper-V components are already installed, you will see the message:
A hypervisor has been detected. Features required for Hyper-V will not be displayed.
On Windows 10 and 11, the Windows Features applet in the Control Panel can be used to enable the Hyper-V role. Run the optionalfeatures command and select the Hyper-V Platform and Management Tools features to install.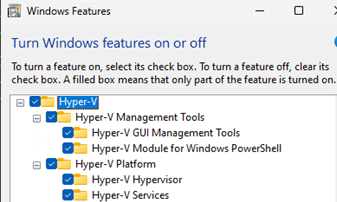
Alternatively, enable the Hyper-V feature from the PowerShell command prompt:
Enable-WindowsOptionalFeature -Online -FeatureName Microsoft-Hyper-V -All
Or with DISM:
dism.exe /Online /Enable-Feature:Microsoft-Hyper-V-All
Restart the computer after the features are installed. Check that hypervisor features are enabled:
Get-WindowsOptionalFeature -Online -FeatureName *hyper*|ft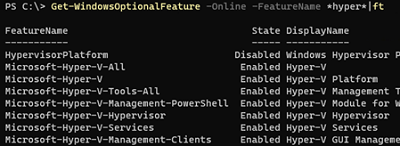
Enable Hyper-V to start automatically:
bcdedit /set HypervisorLaunchType auto
The Hyper-V Manager GUI tool can be used to manage Hyper-V and virtual machines (virtmgmt.msc).
It is also possible to use PowerShell to manage Hyper-V and VMs.
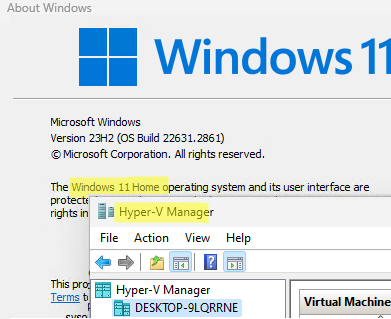
The Hyper-V feature is not available in the Home editions of Windows 10 and 11. However, a little trick allows installing the Hyper-V role from the WinSxS component store even in the Home Windows edition.
Create a batch file enable-hyperv.bat on the desktop with the following code:
pushd "%~dp0"

dir /b %SystemRoot%\servicing\Packages\*Hyper-V*.mum >hyper-v.txt

for /f %%i in ('findstr /i . hyper-v.txt 2^>nul') do dism /online /norestart /add-package:"%SystemRoot%\servicing\Packages\%%i"

del hyper-v.txt

Dism /online /enable-feature /featurename:Microsoft-Hyper-V -All /LimitAccess /ALL

pause
Run the BAT file as an administrator.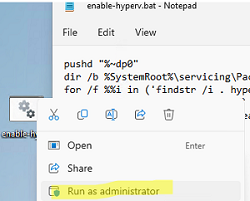
Once the components are installed, restart the computer. Check that the Hyper-V virtualization feature is now available in the Windows Home.